
Select your boat, and we'll show you products that fit your Make & Model.
Our product is made from at least
75% recycled polyester fibres.
Our product is made from at least
75% recycled polyester fibres.
Our product is made from at least
75% recycled polyester fibres.

Enter your account email address and password and click continue to log in.
All fields are mandatory. Please carefully fill all the fields and click continue to create account.

Please select your local RAILBLAZA website.
Please visit our International site to access a wider range of features and products, as well as to find locations that carry RAILBLAZA products near you.
Guest Blog post from Paddleguy.com who has over 500’000 YouTube views to videos that have been captured using our booms and other mounts…read on to learn how he does it
The options for capturing amazing footage from your kayak has never been more exciting as it is right now, with the constant advancement in compact cameras and versatile mounting systems like RAILBLAZA there really is no angle that we cannot capture.
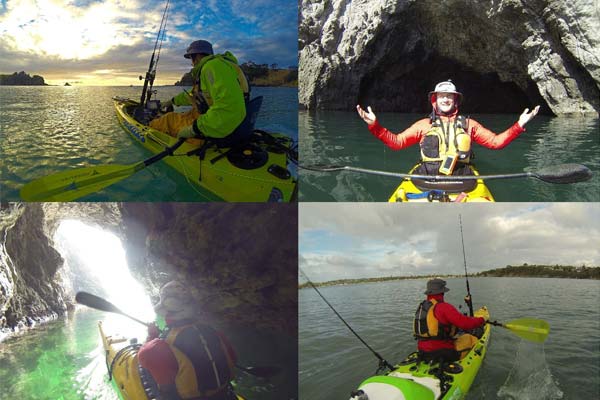
I have been filming from my kayak both for my personal productions and contracted productions for a few years now and have learnt many things along the way about capturing footage of a quality that audiences will find engaging. Along with the camera itself the ability to mount the camera to a versatile and reliable system go hand in hand as far as priority of importance goes.
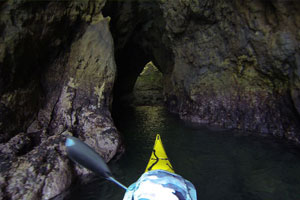
This blog is dedicated to mounting tips for those of you who are looking to capture high quality footage from angles that are usually hard to achieve when on your own. These angles also lend themselves well for those showcasing sponsored products or capturing angles that are useful when doing how to tips or instructional videos and images.
Regardless of the camera you are using a variety of angles will be what sets your productions apart from the rest. To achieve the angles seen in many of my productions and still shots I am using the versatile RAILBLAZA mounting system, I think of it like lego, you can plug and play as you need for the occasion or change the configuration on the go.

The video above and below photos show just some of the ways I am using the RAILBLAZA system to get extra angles that almost give the look of a 3rd party view..yes it is pretty crazy to look at but the footage captured is hard to beat.
Tip – stable and smooth footage is easier to watch and will keep people watching longer
Tip – variety of angles keeps the viewer engaged for longer
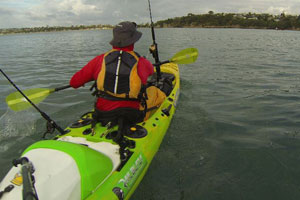
On both my Viking Profish sit on tops and the Barracuda sea kayak, I have tried to get as much height and/or distance away from the kayak. This allows me to capture all that is going on in the cockpit as well as the rest of the environment in the peripheral, really bringing the viewer into the experience as if they were there.
These pics show the latest configuration I have been using to get stable footage from camera positioned out wide behind me, I am controlling the GoPro using wifi to my iPhone, this one gets a few funny looks at the beach when you head out ![]() The footage captured from this angle features in the video above.
The footage captured from this angle features in the video above.
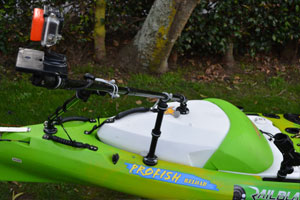
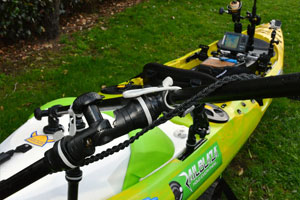
Tip – Set up your mounts the same on the left as the right side so that you can swap the camera according to the best light.
Tip – When the cameras are positioned out of easy reach use a water pistol or spray bottle with fresh water in it to spray clean the lens of cameras that have salt water on them (thanks Stephen Tapp for that idea )
This series of pics shows a similar set up on my Barracuda sea kayak..the footage captured on this trip would have to be my most memorable to date and I am soon to publish the full video from this session exploring the caves at Hahei… incredibly smooth stable footage of an amazing environment.
Over the shoulder view
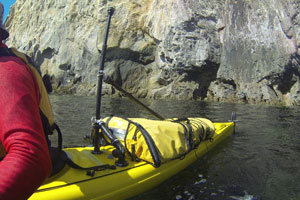

Slightly out to the side and over the shoulder for a different perspective
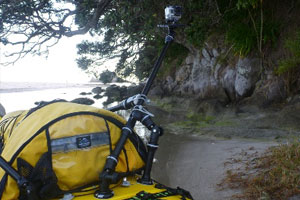
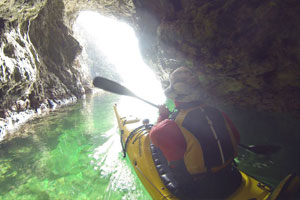
The RAILBLAZA Telepole is a critical part of this set up as well as various extenders… the bracing of this configuration is important so to take away any movement at the camera end (which is significant when the Telepole is fully extended) … a combination of adjustable extenders, fixed extenders and G-Hold 35mm allow me to stabilize this set up.
Before committing your StarPorts make sure you can capture footage without having any of the mounts holding the camera in the shot. Sometimes this is hard to avoid, in those cases the editing suite will allow some cropping to cut them out of shot if ness.


